Blog

  • Smelly Bed? How to Deodorize Upholstered Bed Frame Style

    Smelly Bed? How to Deodorize Upholstered Bed Frame Style

    Walking into a bedroom filled with the scent of fresh linens feels incredible. That sense of relaxation fades fast upon noticing a faint, stale odor emanating from the fabric headboard. Maintaining a sanctuary requires attention to detail beyond just changing the sheets.

    Discovering how to deodorize upholstered bed frame surfaces creates a lasting impression of cleanliness that elevates the entire home and living space.

    The Importance of a Fresh Sleeping Sanctuary

    Ignoring your headboard is a recipe for a funky bedroom atmosphere. Those stylish fabric panels are basically giant sponges for skin cells, sweat, and dust. Deciding to deodorize upholstered bed frame designs regularly transforms your sleep zone from a potential science experiment into a true oasis. 

    Keeping your furniture smelling sweet matters just as much as washing your sheets, so do not let those hidden odors crash your relaxation party tonight.

    Step-by-Step Deodorizing Guide

    Restoring the freshness of your bedroom furniture requires a systematic approach that respects the integrity of the textile fibers. Please follow these detailed steps to achieve a deep and long-lasting refresh on your bed frame.

    Start With Thorough Dry Vacuuming

    Dry vacuuming acts as the foundation for any successful cleaning project. Debris and particles settle deep within the woven fabric of your headboard and side rails, feeding bacteria that create stale scents. 

    Utilizing a vacuum cleaner with a soft brush attachment prevents scratching the material while effectively lifting loose dirt and dead skin cells.

    Before deep cleaning the fabric, make sure the mattress itself is properly supported, because learning how to fix sagging mattress center issues can prevent trapped gaps where dust, sweat, and odors collect.

    Move the nozzle in slow, deliberate, and overlapping horizontal strokes across every inch of the fabric. Pay special attention to deep crevices, the areas around tufted buttons, and the corners where side rails meet the headboard.

    These tight spots serve as primary gathering points for dust accumulation and allergens, so dedicated attention here yields the most significant results.

    The Baking Soda Neutralization Method

    The Baking Soda Neutralization Method

    Baking soda serves as the gold standard for natural odor removal in any home. This alkaline powder works by physically absorbing moisture and trapped particles, effectively neutralizing the source of the smell rather than masking it with perfumes.

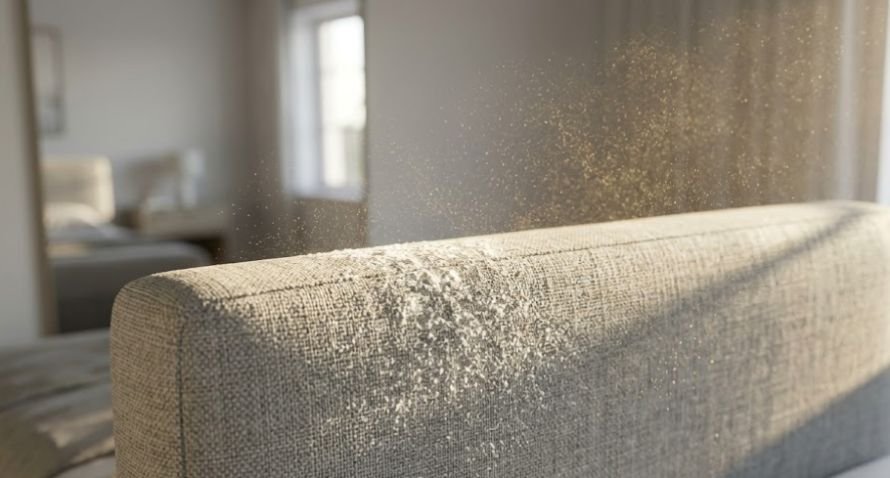
    Sprinkle a thin, even layer of baking soda across the entire surface of the headboard and the visible upholstered side rails.

    Allow the powder to sit undisturbed on the fabric for at least twenty to thirty minutes, though leaving it for a few hours improves the outcome for persistent smells. Vacuum away every trace of the powder using the same upholstery tool from the previous step. 

    Mixing five to ten drops of lavender or eucalyptus essential oil into the baking soda before application provides a subtle, spa-like scent if desired.

    Targeted Spot Cleaning Techniques

    Targeted Spot Cleaning Techniques

    Spills, accidents, or specific localized stains often require more than just dry powders. Mix a solution consisting of warm water, a single tablespoon of mild dish soap, and a single tablespoon of baking soda in a small bowl.

    Dip a clean microfiber cloth into this mixture and wring it out completely until it feels barely damp to the touch.

    Gently dab the affected area with the cloth rather than rubbing the fabric aggressively. Scrubbing can push the stain deeper into the cushioning or damage delicate fibers, while dabbing lifts the debris away from the material.

    Rinse the area by wiping with a second cloth dipped in plain water and let the frame air dry completely before replacing any bedding.

    Using Fabric Refreshers Safely

    Lingering odors resulting from humidity or stagnant indoor air sometimes need an extra boost. Specialized fabric refreshers neutralize molecular compounds that cause smells to persist.

    Hold the spray bottle roughly six to eight inches away from the upholstered surface and mist the material until it appears lightly damp.

    Always test an inconspicuous area on the back of the headboard before spraying the entire front panel to ensure the product does not cause water spots or discoloration.

    Allow the furniture to air dry completely for several hours with the bedroom windows open or a fan running to ensure full evaporation. This drying time is crucial to prevent the development of new mildew scents.

    Pro Tips for Long Term Freshness

    Maintaining a clean bed frame involves consistent habits that keep smells at bay between deep cleans. Regularly rotating your pillows and washing them prevents the transfer of hair oils onto the headboard fabric.

    Keeping your bedroom well-ventilated by opening windows for a few minutes each morning allows fresh air to circulate, reducing the humidity levels that contribute to a musty scent.

    Just like smart living room furniture layout ideas improve airflow and comfort in shared spaces, a well-arranged bedroom helps prevent trapped humidity and stale furniture odors.

    Adding a small, breathable sachet of dried lavender or cedar inside the gap between your mattress and the headboard provides a subtle, long-term freshening effect.

    These natural aromatic materials help to mask ambient odors and keep the fabric smelling crisp for weeks at a time. Taking these small steps prevents the need for intensive cleaning sessions in the future.

    Understanding Fabric Care Codes

    Understanding Fabric Care Codes

    Every piece of upholstered furniture comes with specific manufacturer instructions that dictate how to clean the material safely.

    Locating the care tag is essential before you attempt to deodorize upholstered bed frame textiles. Look for this tag along the bottom edge or the back of the frame, as it contains vital information regarding the chemical composition of the fabric.

    A code of W indicates that the fabric responds well to water-based cleaners. A code of S requires solvent-based cleaning solutions, meaning you should avoid water entirely to prevent ring stains. 

    A code of W/S allows for both, while a code of X strictly limits your options to vacuuming only. Respecting these codes ensures you achieve the desired freshness without ruining the appearance or texture of your beautiful bedroom furniture.

    Frequently Asked Questions

    1. How to get musty smell out of fabric bed frame?

    To effectively remove musty scents, vacuum the fabric thoroughly first to remove surface dust. Apply a generous layer of baking soda, allow it to sit for at least thirty minutes, and then vacuum it off completely. This process neutralizes the odor at its source by absorbing the moisture that causes the mustiness to develop.

    2. How to get rid of musty smell in upholstered furniture?

    Eliminate musty odors by improving ventilation in the room and using a mixture of baking soda and a light alcohol mist. Alcohol evaporates quickly and kills bacteria, while baking soda draws out dampness. Regular vacuuming is also crucial to ensure that you successfully deodorize upholstered bed frame pieces completely and keep them fresh.

    3. Why does my fabric headboard smell musty?

    Fabric headboards often develop musty odors because they absorb ambient moisture, sweat, and natural skin oils over time. Because the padding beneath the fabric is porous, it holds onto these elements and creates a damp environment where bacteria can flourish, leading to the stale scent you eventually notice in the room.

    4. Are upholstered bed frames hard to keep clean?

    Upholstered bed frames are not difficult to maintain if you vacuum them weekly to remove surface dust. By taking simple steps to deodorize upholstered bed frame surfaces regularly, you prevent the buildup of dirt and oils, ensuring that your bedroom furniture remains a clean, comfortable, and hygienic part of your home.

    Refresh Your Oasis Today

    Bringing freshness back to your bedroom proves to be an achievable task. By dedicating a few minutes to vacuuming, baking soda treatments, and careful spot cleaning, you can effectively deodorize upholstered bed frame fabrics and enjoy a healthier sleep environment. 

    Consistent maintenance preserves the beauty of your furniture, ensuring your bedroom remains the peaceful, sweet-smelling retreat you deserve every single night.


  • Fix a Sagging Mattress Center: Save The Day With Easy Hacks!

    Fix a Sagging Mattress Center: Save The Day With Easy Hacks!

    Waking up feeling like you spent the night folded inside a taco shell is an exhausting way to start your morning. That deep, annoying crater right in the middle of your bed ruins your sleep quality and turns your beautiful bedroom into a source of morning back aches. 

    Trying to fix a sagging mattress center is a challenge that every homeowner eventually faces as furniture naturally ages. You do not have to throw out your favorite bedroom decor or spend thousands on a brand new bedroom set just yet.

    There are several clever, budget-friendly design tricks and structural fixes that can rescue your bed frame setup and level out that stubborn middle dip tonight.

    Key Takeaways

    • Center dips usually happen when your bed frame lacks a solid middle support leg or when under-bed wooden slats stretch and bow.
    • Plywood sheets or dense Bunkie boards provide an immediate, flat structural fix beneath your mattress.
    • Denser foam mattress toppers can successfully mask surface deeper indentations and restore vital spinal alignment.
    • Regular 180-degree rotations help distribute your body weight evenly across the entire surface of the bed.
    • Definite structural sagging deeper than 1.5 inches usually means it is time to upgrade your home bedding.

    Fixing a Sagging Mattress Center is Absolutely Crucial

    Sleeping on a slope turns your bedroom oasis into a nightly battleground for comfort. It is vital to learn how to fix a sagging mattress center because your body alignment dictates your daily energy, mood, and productivity. 

    The same balance principles used in how to arrange living room furniture with TV also apply to your bedroom, where proper support and smart placement create a more comfortable layout.

    Leaving a central dip unaddressed strains your back, ruins your expensive furniture investment, and degrades your health. A level bed creates a beautiful bedroom layout and guarantees deep, painless, and truly restorative sleep.

    Evaluating the Core Foundation of Bedroom 

    Your mattress is only as good as the structural platform supporting it from beneath the sheets. Often, the mysterious sinking sensation in the middle of your bed is actually a hidden structural failure within your bed frame or box spring.

    Executing the Reliable Bedroom Floor Test

    The fastest way to diagnose your mattress issue is to move the bed directly onto your bedroom floor. If the annoying middle dip completely disappears when the mattress sits flat on the floor, your bed frame or box spring is the true culprit.

    This simple test saves you from throwing away a perfectly good mattress when you actually just need to fix your underlying wood base.

    Inspecting Your Bed Frame Center Legs

    Inspecting Your Bed Frame Center Legs

    Queen and king beds carry immense weight and absolutely require a dedicated center support leg that firmly touches your floor. If your current metal or wooden bed frame only supports the four outer corners, gravity will naturally pull the middle downward over time.

    Adding an adjustable metal support leg to your existing bedroom furniture is a cheap and highly effective way to stabilize your sleep setup.

    Checking for Bowed or Wide Wooden Slats

    Take a close look at the wooden slats on your platform bed to ensure they are not cracking, bowing, or warping under pressure.

    The spacing between your supportive wooden slats should never exceed three inches, especially if you own a heavy modern hybrid or memory foam mattress. Wide gaps allow the flexible foam layers to squeeze downward, creating a permanent valley right where you sleep.

    Utilizing Rigid Support Boards and Heavy Duty Lifters

    When your bed frame is perfectly sturdy but the mattress itself continues to plunge, you need to introduce extra rigid layers underneath. Adding dense support materials can instantly level out your sleeping surface and extend the lifespans of your favorite bedding accessories.

    Inserting Premium Custom Cut Plywood

    Inserting Premium Custom Cut Plywood

    Heading down to your local home improvement center to purchase a piece of real wood is a classic interior design hack.

    Have the shop cut a sheet of half-inch or three-quarter-inch thick plywood to fit the exact dimensions of your mattress base. Sliding this solid wooden board directly between your mattress and your box spring completely eliminates the sagging zones.

    Investing in High Density Foam Firming Pads

    If you prefer a commercial product over raw wood, you can buy pre-cut high-density foam mattress firming pads from a bedding supplier. These specialized padding layers are specifically tapered to fill the lower gaps and push the sagging center back into a flat position.

    They provide a smooth, cushioned lift that integrates seamlessly with your existing bedroom furniture arrangement.

    Quick Household Hacks to Instantly Level Your Bed

    If you need a fast solution to stop your hips from sinking before bedtime arrives tonight, you can use common household items for temporary relief. These immediate adjustments will keep your spine aligned while you arrange for a more permanent furniture upgrade.

    Practicing Strategic Towel Placement Under Your Hips

    Practicing Strategic Towel Placement Under Your Hips

    You can easily counteract a minor dip by folding a firm bath towel or a thick blanket and placing it directly under your mattress core. Position the folded material right beneath the area where your hips and lower back rest during the night.

    This targeted padding props up your heaviest body parts, preventing the painful spinal twisting that causes morning stiffness.

    Installing Customizable Air Support Cushion Systems

    For a more high tech temporary solution, consider purchasing an inflatable air support pad like a multi-zone air system. These thin, durable air bladders slide right under your mattress and feature a convenient manual hand pump.

    You can pump air directly into the specific zones that require extra lift, giving you total control over the firmness of your bed center.

    Frequently Asked Questions

    1. What to do if a mattress is sagging in the middle?

    To fix a sagging mattress center immediately, place a rigid piece of cut plywood or a firm Bunkie board directly underneath the mattress core. This provides the flat, sturdy structural base needed to pop the sunken middle area back up.

    2. How to fix a dip in the middle of bed?

    You can easily fix a minor center dip by rotating your mattress 180 degrees to utilize the fresher foot section. For immediate relief, place a tightly folded towel or an inflatable air support system under the mattress center.

    3. What is the best mattress for ankylosing spondylitis?

    A medium firm memory foam or hybrid mattress featuring targeted zonal lumbar support is best. It keeps the spine perfectly aligned, reduces joint pressure, and prevents the painful nighttime sagging that worsens chronic spinal inflammation.

    4. Can a bad mattress cause sciatica?

    Yes, a sagging mattress forces your spine into an unnatural curve, compressing the lumbar region. This constant pressure can pinch the sciatic nerve, triggering radiating pain, numbness, and severe discomfort down through your hips and legs.

    Say Goodbye to the Crater and Hello to Perfect Sleep

    Sleeping on a mattress that sinks in the middle ruins your morning energy and takes the comfort out of your home.

    Once the mattress feels level again, learning how to layer bedding queen bed can help you rebuild a softer, cleaner, and more inviting sleep setup.

    By reinforcing your wooden slats, adding a solid plywood base, or layering a premium foam topper, you can easily fix sagging mattress center issues without breaking your budget. 

    Take control of your bedroom comfort tonight so you can finally enjoy the deep, pain-free sleep you deserve.

  • What Size Bed Fits My Room? The Ultimate Spatial Guide

    What Size Bed Fits My Room? The Ultimate Spatial Guide

    Figuring out what size bed fits my room prevents you from turning your peaceful sleep sanctuary into a stressful obstacle course. Choosing furniture blindly leads to stubbed toes and doors that will not open. A little bit of spatial planning upfront guarantees your bedroom remains a relaxing haven instead of a cramped furniture warehouse.

    The Bed Frame Hidden Inches

    Most standard design websites will tell you a mattress fits a space based solely on its raw manufacturing measurements. Our hands-on experience in bedroom styling proves that chunky upholstered headboards or solid wood platform beds can easily add up to six extra inches to your total length and width. 

    Forgetting to account for these extended profiles is the primary reason doors accidentally scrape against the corners of a new setup.

    The Real Meaning of Walkway Clearance

    Walking comfortably around your sleep sanctuary means aiming for roughly thirty inches of open space between your frame and the nearest wall or dresser. Dropping below twenty-four inches creates a tight, uncomfortable squeeze that makes changing your fitted sheets a frustrating weekly workout. 

    We always advise giving major walkways top priority so your main bedroom retains an airy, stress-free flow.

    Mapping Architectural Structural Obstacles

    Low window sills, baseboard heaters, and electrical outlets dictate exactly where your headboard can safely rest. Placing a tall frame directly in front of a floor register can block essential airflow and cause uneven home weatherization during colder months. 

    Always look closely at the walls for light switches and protruding trim pieces before finalizing your dream layout plan.

    Sizing Your Sanctuary Smartly

    Every bedroom size has an ideal furniture pairing that creates a harmonious aesthetic balance.

    Small Scale Sleep Setups

    Small Scale Sleep Setups

    Cozy apartments or historic homes often feature smaller guest zones measuring roughly nine by ten feet. For these compact floor plans, a standard twin xl or full-sized platform frame keeps the footprint minimal while offering plenty of sleeping surface for single adults. 

    Opting for sleek silhouettes with built-in under-bed storage drawers helps maximize every available square inch of usable flooring.

    Standard Spaces and Versatile Queens

    Average American primary bedrooms usually measure around ten by twelve feet, which is the absolute sweet spot for a gorgeous queen arrangement.

    This setup provides enough breathing room for two matching nightstands and a tall chest of drawers against the opposite wall. 

    A queen room works best when storage is scaled properly, so understanding dresser vs chest of drawers bedroom can help you choose furniture that fits without crowding the layout.

    It is the most popular configuration because it offers couples a spacious feel without overwhelming the entire floor plan.

    Expansive Layouts and Master Kings

    Grand primary suites measuring twelve by twelve feet or larger can effortlessly anchor a majestic eastern king or California king furniture group. 

    If your bedroom connects to larger shared spaces, exploring living room furniture for open floor plan can help you create a more cohesive flow throughout your home.

    These spacious rooms give you the freedom to incorporate luxury additions like a cozy reading armchair, a wide double dresser, or an elegant storage bench at the foot of the bed.

    Large rooms actually need these substantial furniture pieces to avoid feeling cold, empty, and echoey.

    What Size Bed Fits My Room Blueprint Guide

    Perfecting your spatial arrangement takes less than an hour when you use our foolproof physical testing strategy.

    Visualizing Your Layout in Real Life

    Visualizing Your Layout in Real Life

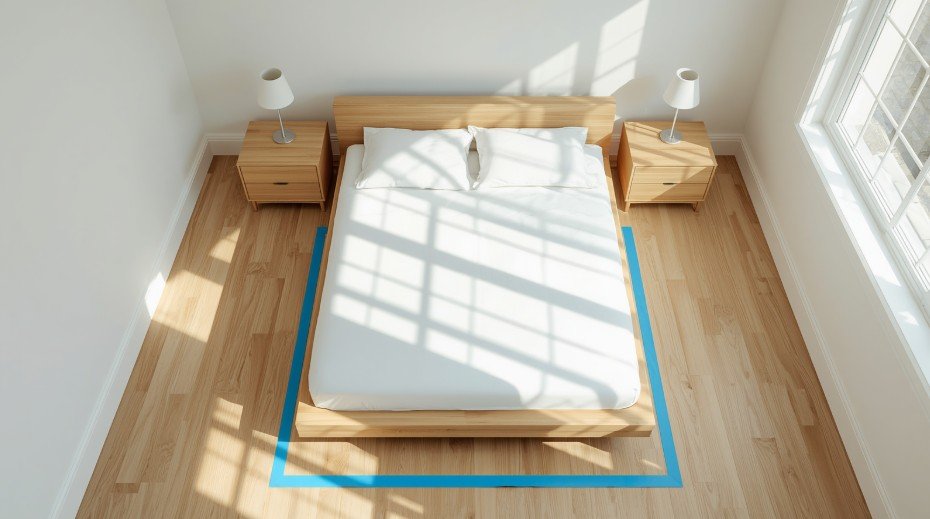
    Clear out all temporary clutter from the space so you can see the bare walls and open floor clearly. Grab a roll of bright blue painters tape and map out the exact outer dimensions of your desired furniture ensemble right onto the floorboards. 

    Leave this tape outline on the ground for a full day while walking through the space to ensure you can easily access your closet doors, outlets, and windows.

    Simulate your daily routines by opening wardrobe drawers fully to confirm nothing collides with your planned layout structure.

    Standard Mattress Sizing Matrix

    To choose the right bed, measure your room and aim to leave at least twenty-four inches of walking clearance on all accessible sides. A standard Queen Mattress (60″ x 80″) fits nicely in a 10′ x 10′ space, while a Twin Size (38″ x 75″) works well in rooms 9′ x 9′ or larger. Selecting the ideal bed size involves matching dimensions to both your room proportions and your lifestyle.

    Finding Your Perfect Mattress Match

    Twin (38″ x 75″) is best for toddlers, solo sleepers, and smaller bedrooms or dorms. Twin XL (38″ x 80″) is great for taller single individuals and typically used in college dorm rooms. Full / Double (54″ x 75″) is ideal for single adults wanting more sprawl room, or guest spaces. 

    Queen (60″ x 80″) remains the most popular choice for couples and master bedrooms, requiring a minimum room size of 10′ x 10′ to 10′ x 14′. King (76″ x 80″) offers maximum space for couples and families but requires a room size of at least 12′ x 12′. 

    California King (72″ x 84″) is narrower but longer than a standard King, making it perfect for taller people who have a room measuring at least 12′ x 12′. Remember that your bed frame and headboard will add an extra 2 to 6 inches to the overall footprint, and you must account for closet doors or swing arcs.

    Navigating Real-World Spatial Snags

    Navigating Real-World Spatial Snags

    Tricky floor plans demand creative furniture positioning to maintain functional harmony.

    Managing Awkward Swing Radiuses

    Closet doors and entryways that swing inward can easily ruin a tight room arrangement if you choose the wrong frame thickness.

    We highly recommend switching out standard hinged closet doors for sleek sliding barn doors or elegant bi-fold alternatives to reclaim valuable floor real estate. 

    This quick swap allows you to place your nightstands closer to the door frame without risking daily collisions.

    Dealing With Off-Center Window Placements

    Centering your headboard along the main wall is the traditional choice, but off-center windows often throw off visual symmetry. Pushing a low-profile platform setup directly underneath a window can look incredibly cozy if you frame the area with beautiful floor-to-length curtains. 

    Just ensure the headboard height does not completely block out your natural morning light or cover up crucial ventilation points.

    Frequently Asked Questions

    1. What size bed fits my room perfectly?

    To determine what size bed fits my room, measure your floor space and subtract thirty inches from the sides to allow for open walking lanes.

    2. What kind of mattress is best for lupus patients?

    Pressure-relieving memory foam or responsive latex mattresses work best to cushion tender joints. Look for advanced cooling gel properties to help manage nighttime inflammation.

    3. Can a queen bed fit in a 120 sq ft room?

    Yes, a queen bed fits comfortably inside a ten by twelve foot room. This leaves enough space for two small nightstands and walkways.

    4. What size bed should go in a 12×12 room?

    A twelve by twelve room can easily accommodate a standard king or a luxurious California king while leaving plenty of space for storage.

    Your Dream Layout Awaits

    Discovering what size bed fits my room is all about balancing daily comfort with smart home and living room design principles. Prioritizing accurate measurements, frame bulk, and proper walkway clearances ensures your space remains an inviting oasis. 

    Take your time, map the floor with tape, and select a beautiful furniture arrangement that turns your sleeping space into a perfectly proportioned haven.

    If you tell me your room dimensions (length and width in feet), what other furniture you need to fit (dressers, nightstands, etc.), and who will be sleeping on the bed, I can help you narrow down the exact size that works best for your layout!

  • Don’t Buy a Dresser vs Chest of Drawers Bedroom Setup Yet! 

    Don’t Buy a Dresser vs Chest of Drawers Bedroom Setup Yet! 

    Stepping into a chaotic room with clothes draped over chairs makes anyone realize that proper home and living organization is an absolute lifesaver. Finding the perfect balance between style and utility often brings you down to one classic furniture debate: the horizontal dresser versus the vertical chest of drawers. 

    Investing in the right dresser vs chest of drawers bedroom setup will completely change your morning routine and bring long-term harmony to your personal sanctuary.

    Unpacking the Core Differences

    Understanding the structural differences between these two heavyweights will completely change how you plan your master suite or guest room layout.

    Sizing Up the Horizontal Dresser

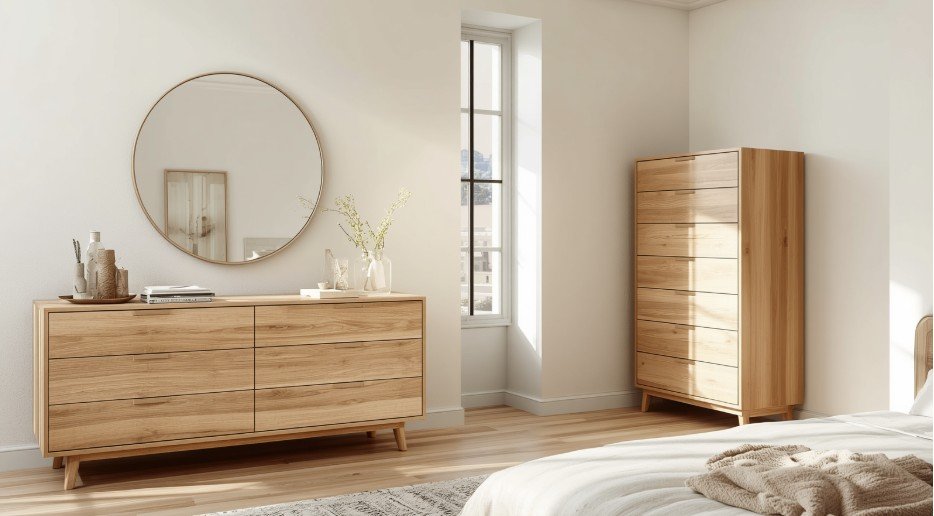
    A standard dresser is a long, wide furniture piece that sits relatively low to the ground, usually topping out around waist height between 30 to 40 inches. 

    Because of this wide footprint spanning 50 to 60 inches across, it gives you spacious drawers that are perfect for folded everyday clothes like t-shirts and underwear. The sprawling top surface is an interior designer’s dream, offering plenty of room to style beautiful lamps, jewelry organizers, or decorative trays.

    Discovering the Vertical Chest

    A traditional chest of drawers takes the opposite approach by stacking its storage compartments vertically to maximize your wall space with a height of 48 to 60 inches.

    These tall units are incredibly slender, measuring only 30 to 40 inches wide, which means they can slip into tight corners, walk-in closets, or narrow walkways where a wide unit would block traffic. 

    While you lose out on a wide tabletop display surface, you gain valuable floor area to keep your room feeling open and breezy.

    Key Differences at a Glance

    Key Differences at a Glance

    Evaluating how these units stack up side by side makes it easy to spot the right choice for your lifestyle.

    Dimensions and Footprint Analysis

    The physical presence of these pieces alters the room landscape in completely opposite ways. Dressers command significant horizontal floor space, requiring a long, uninterrupted wall to sit comfortably without blocking doors or outlets. 

    Chests utilize vertical room real estate instead, making them the ultimate problem solvers for homes with minimal floor space but plenty of open wall height for  rightly living small.

    Storage Style and Drawer Depth

    The interior architecture of each piece dictates exactly what kind of wardrobe items it can comfortably hold. Dresser drawers are typically shallower and wider, allowing you to lay out clothing in clear, visible rows so nothing gets buried at the bottom. 

    Chest drawers are much deeper, making them excellent for storing bulkier items like thick sweaters, extra bedding, heavy denim, or winter blankets.

    Top Surface Usage and Versatility

    The upper boundary of your furniture determines whether it serves a dual purpose in your daily lifestyle. Dressers provide ample surface space for placing a dresser with mirror combination, displaying sentimental decorative items, or setting up a flat-screen television. 

    Chests offer minimal top space, meaning they are built purely for clothing storage rather than serving as a display hub or a media center.

    Room Fit and Ideal Placement

    Every layout has a natural affinity for one of these pieces based on total square footage and traffic flow. Dressers are best suited for master bedrooms and larger floor plans where you have room to move around freely.

    Chests are ideal for compact rooms, guest bedrooms, children’s spaces, or even narrow hallways that need an extra organizational boost.

    Smart Styling and Versatility Beyond the Bedroom

    Smart Styling and Versatility Beyond the Bedroom

    Decorating a home means looking at furniture as an investment that can evolve with your living situations over time.

    Creating a Vanity Hub with Dressers

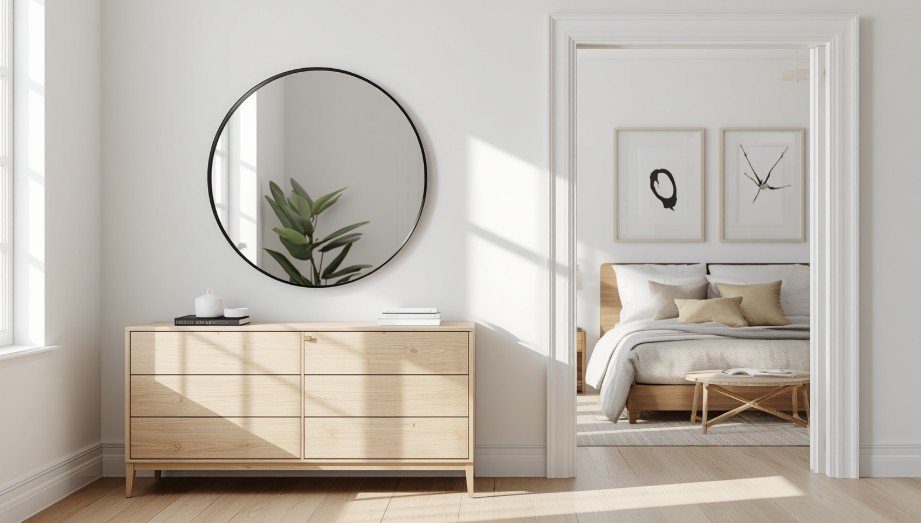
    Because a dresser sits low to the ground, it leaves a generous amount of open wall space directly above the unit. This makes it the absolute perfect partner for a matching wood frame mirror or an oversized circular statement piece. 

    A stylish bedroom setup also depends on freshness and comfort, so learning how to deodorize upholstered bed frame can help the entire space feel cleaner and more inviting.

    By adding a small stool and a couple of clear acrylic organizers, you instantly transform a simple clothing storage unit into a gorgeous, high-functioning morning vanity station.

    Moving Storage into Diverse Living Spaces

    Chests of drawers are secret chameleons in the world of home decor because their compact footprint fits beautifully outside your sleep space. A beautifully crafted wooden chest looks right at home sitting in a formal dining room to hold table linens and silver. 

    You can just as easily place one in a spacious entryway to wrangle winter gloves, or tuck it into a home office to keep printing paper and supplies neatly hidden away.

    How to Choose the Right One

    Assess your daily life balance and your room’s physical limitations will point you directly toward the winning furniture piece.

    Analyzing Your Floor Plan and Ceilings

    Take a quick look around your room and note where your windows, doors, and electrical outlets sit before making a final purchase. If your space has low, slanted ceilings or large windows that drink up wall space, a low-profile dresser will fit under those architectural features beautifully. 

    On the flip side, if you are working with a tight apartment floor plan but have soaring ceilings, a tall chest draws the eye upward and capitalizes on that unused vertical real estate.

    Assessing Your Daily Wardrobe Storage Needs

    Think about the actual items you need to organize because the layout of the drawers drastically changes how you interact with your clothes. Couples sharing a room typically thrive with a double dresser because the side-by-side columns create a natural, fair division of personal space. 

    Bedroom storage should support everyday comfort too, so learning fix sagging mattress center can help you create a room that feels organized, balanced, and restful.

    Single sleepers or minimalist decorators often find that a five-drawer chest offers more than enough organized vertical space for a streamlined wardrobe.

    Maximize Your Space: The Pro Layout Method

    Maximize Your Space: The Pro Layout Method

    Arranging your bedroom furniture correctly requires a strategic approach to balance visual weight, maximize storage capacity, and preserve comfortable walking paths around the bed.

    First, measure the exact walking clearance in front of your proposed furniture location by pulling out a tape measure and marking the depth of the piece with the drawers fully extended. 

    You need at least two feet of open floor space past an open drawer to comfortably stand, sort laundry, and walk by without bumping your shins. If you are debating a dresser vs chest of drawers bedroom layout, this simple measurement test will instantly eliminate options that are too deep for your floor plan.

    Second, map out the visual height boundaries of the room by placing taller furniture pieces on walls opposite your main entrance to prevent the space from feeling cramped when you cross the threshold. 

    If you place a towering chest of drawers right next to the entry door, it casts a heavy visual shadow over the entryway. Keeping the sightlines open ensures that your home environment feels inviting, airy, and balanced from the moment you walk through the door.

    Third, multi-purpose your surfaces by utilizing the low profile of a wide dresser to position a flat-screen television at the perfect ergonomic viewing height from your bed.

    If you opt for a tall chest instead, skip the television and use the top surface to display a cascading pothos plant or a small sculptural accent piece that celebrates the height. This intentional zoning keeps your home looking curated rather than cluttered.

    Frequently Asked Questions

    1. Is a chest or dresser better for bedroom setups?

    A dresser is better for large spaces needing deep storage and mirror placements. A chest is superior for smaller rooms or tight corners because it utilizes vertical wall space without consuming precious floor area.

    2. Is it called a dresser or a chest of drawers?

    A dresser is short, wide, and designed to accommodate a mirror on top. A chest of drawers is a tall, narrow vertical tower of drawers that does not pair with a mirror.

    3. Do people still use chest of drawers in modern homes?

    Yes, chests of drawers remain incredibly popular in modern home design. They are essential for apartment living, tiny homes, children’s spaces, and maximizing storage in walk-in closets or multi-purpose home offices.

    4. Should a bedroom have a dresser or vertical storage?

    A space should have a dresser if you have the horizontal wall space and prefer organizing clothes side-by-side. However, a chest or built-in closet system can easily replace it if space is limited.

    The Perfect Match for Your Bedroom Bliss

    Finding the right balance between a spacious dresser vs chest of drawers bedroom setup comes down to honoring your home’s unique footprint.

    Whether you choose the grand, mirror-ready styling surface of a horizontal dresser or the smart, space-saving vertical height of a sleek chest, selecting a piece that cuts the clutter will instantly elevate your daily peace of mind.

  • Home Office Cable Management Ideas for a Cleaner Desk

    Home Office Cable Management Ideas for a Cleaner Desk

    A messy desk can make even a beautiful workspace feel stressful. I have noticed that when cords are tangled under the desk, chargers are hanging everywhere, and power strips are sitting on the floor, it becomes harder to focus. 

    The good news is that Home Office Cable Management Ideas for a Cleaner Desk do not have to be expensive or complicated. With a few simple changes, any workspace can feel calmer, safer, and easier to use every day.

    Why Cable Management Matters in a Home Office

    Cable management is not only about looks. Loose cords can collect dust, create tripping hazards, block chair movement, and make it difficult to clean around the desk. A cleaner setup also helps protect devices because cables are less likely to bend, pull, or disconnect by accident.

    A tidy desk makes the workspace feel more intentional. When everything has a proper place, it becomes easier to sit down, work, and stay focused without visual clutter.

    Cable control works even better when paired with smart home office layout ideas for maximum productivity, because a well-planned desk position makes cords easier to hide, reach, and maintain.

    Start by Removing What You Do Not Need

    Before buying cable trays or clips, start with a full cable reset. Unplug everything safely and check which cords are actually used daily. Old chargers, extra HDMI cables, unused USB cords, and duplicate adapters often create most of the mess.

    Group cables by device, such as monitor, laptop, printer, lamp, phone charger, and power strip. This makes it easier to decide what should stay on the desk, what can go under the desk, and what can be stored away.

    Use an Under-Desk Cable Tray

    Use an Under-Desk Cable Tray

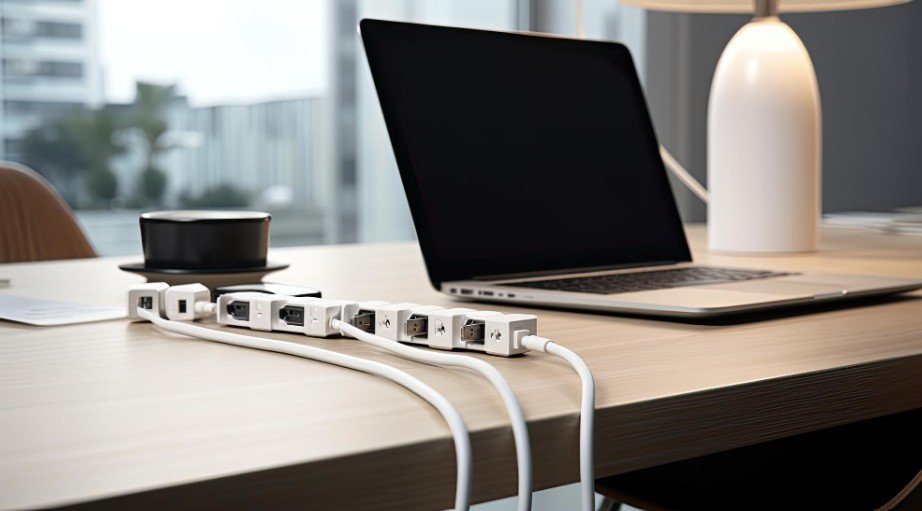
    An under-desk cable tray is one of the cleanest ways to hide power strips and long cords. Instead of leaving everything on the floor, the tray keeps cables lifted and tucked behind the desk.

    This works especially well for monitors, desktop computers, speakers, and docking stations. For a renter-friendly setup, choose clamp-on trays or adhesive-mounted options that do not require drilling.

    Control Daily Chargers With Cable Clips

    Phone chargers, laptop chargers, and earbud cables are usually the cords people reach for every day. If they keep falling behind the desk, cable clips can solve the problem quickly.

    Attach clips along the back or side edge of the desk so each charging cable stays within reach. This keeps the surface clean without hiding the cords you actually need often.

    Bundle Long Cables With Velcro Straps

    Long cords create loops, knots, and clutter. Velcro straps are better than tight plastic zip ties because they can be opened and adjusted later.

    Bundle cables by direction, not randomly. For example, keep monitor cords together, charging cords together, and power cords together. This makes troubleshooting easier when you need to unplug one device.

    Hide Floor Cords With Cable Boxes and Raceways

    Hide Floor Cords With Cable Boxes and Raceways

    If a power strip must stay near the floor, place it inside a cable management box. This hides bulky plugs and keeps dust away from the outlet area while helping you organize your tech and purge unnecessary cords.

    For cords running across a wall or baseboard, use adhesive cable raceways. These are helpful for printers, lamps, routers, and desks placed away from the wall. Choose a color that blends with the wall or floor for a cleaner look.

    Standing Desk Cable Management Tips

    Standing desks need extra cable length because the desk moves up and down. If the cords are too short, they can pull on monitors, plugs, or docking stations.

    Leave a soft cable loop behind the desk so wires can move freely. A cable spine or flexible sleeve can guide cords from the desktop to the outlet while keeping them neat during height changes.

    Better Ideas for Small Desks

    Small desks need smart cable placement because every inch matters. Mount the power strip under the desk, use a slim charging station, and keep only one main charging cable on the surface.

    Laptop users can use a docking station to reduce cable clutter. Instead of plugging in several cords every day, one connection can manage the monitor, keyboard, mouse, and charger.

    Common Cable Management Mistakes to Avoid

    Common Cable Management Mistakes to Avoid

    Do not hide overloaded power strips inside closed spaces without ventilation. Do not pull cables too tightly, especially near chargers and monitor ports. Avoid duct tape because it leaves residue and looks messy over time.

    Another mistake is organizing cables once and never checking them again. Good cable management needs small updates whenever you add a new monitor, lamp, printer, or charger.

    Quick Budget-Friendly Fixes

    You do not need a luxury desk setup to get results. Binder clips can hold charging cables at the desk edge. Velcro wraps can shorten long cords. Adhesive hooks can guide wires under the desktop. A simple basket can hide a power strip near the wall.

    These simple cord solutions also pair well with home office decorating ideas on a budget, helping your desk look cleaner and more stylish without expensive upgrades.

    These small fixes are perfect for anyone who wants Home Office Cable Management Ideas for a Cleaner Desk without spending too much money.

    Frequently Asked Questions

    1. What is the easiest way to manage cables on a desk?

    The easiest method is to unplug everything, remove unused cords, group cables by device, and use Velcro straps with cable clips.

    2. How do I hide cables without drilling holes?

    Use adhesive cable clips, clamp-on cable trays, cable sleeves, and raceways. These options are renter-friendly and easy to remove.

    3. Are cable trays worth it?

    Yes, cable trays are useful because they keep power strips and long cords off the floor, making the desk area cleaner and safer.

    4. What are the best Home Office Cable Management Ideas for a Cleaner Desk?

    The best ideas include under-desk trays, cable clips, Velcro straps, cable boxes, raceways, and smart charger placement.

    Final Thoughts

    A cleaner desk can completely change the way a workspace feels. I like starting with the basics: remove what is not needed, group the important cords, and hide the bulky parts under or behind the desk. 

    From there, simple tools like clips, trays, sleeves, and Velcro straps make the setup easier to maintain. With the right Home Office Cable Management Ideas for a Cleaner Desk, your workspace can look sharper, feel calmer, and support better focus every day.

  • Home Office Shelving Ideas to Maximize Storage

    Home Office Shelving Ideas to Maximize Storage

    I used to think a desk and chair were enough for a productive workspace. Then the papers, notebooks, chargers, folders, printer supplies, and random office items started taking over every surface. 

    That is when I realized the right shelves can completely change how a workspace feels and functions. These Home Office Shelving Ideas to Maximize Storage can help turn a cluttered corner into a cleaner, smarter, and better-looking work area.

    Why Shelving Matters in a Home Office

    A home office should make work easier, not more stressful. When storage is poor, your desk becomes a landing spot for everything. Shelving solves that by moving items upward, opening floor space, and keeping daily essentials within reach.

    Good shelves also improve the look of the room. They can display books, plants, framed prints, storage baskets, and work tools without making the office feel crowded. Whether the workspace is in a bedroom, spare room, hallway, or living room corner, shelving helps create order.

    Use Floating Shelves for Small Offices

    Floating shelves are one of the easiest ways to add storage without using floor space. They work well above desks, beside windows, or on narrow walls where a cabinet would feel too bulky.

    Use them for books, small bins, office supplies, framed art, and light decor. For a cleaner look, keep heavier items on the lower shelves and lighter pieces above. Matching baskets or boxes can hide cables, paper clips, sticky notes, and chargers.

    Add Built-In Shelves for a Polished Look

    Built-in shelves give a home office a custom, high-end feel. They are ideal for people who need serious storage for books, files, binders, and office equipment.

    Floor-to-ceiling built-ins make the most of vertical space and support smart floor and ceiling functions. Lower cabinets can hide messy items, while open upper shelves can hold books and decor. If the office is used for video calls, built-ins also create a strong background that looks professional.

    Try Corner Shelves for Awkward Spaces

    Try Corner Shelves for Awkward Spaces

    Corners are often wasted in home offices. Corner shelves can turn those unused areas into smart storage zones. They are helpful in smaller rooms where every inch matters.

    Use corner shelves for reference books, a small printer, decorative boxes, or extra supplies. A tall corner shelving unit can also help balance the room visually while keeping clutter off the desk.

    Use Cube Shelves for Flexible Storage

    Cube shelves are practical because they work with bins, baskets, books, and display pieces. They are especially useful for shared home offices, craft workspaces, or family command centers.

    Each cube can serve a different purpose. One can hold files, another can store tech accessories, and another can display decor. Fabric bins help hide clutter while keeping everything easy to access.

    Cube shelves also work well when a home office doubles as a family study area. If you need a calmer setup for children’s homework, kids furniture for quiet study corner smart ideas can help you choose practical pieces that support focus, storage, and comfort in the same shared workspace.

    Install Shelves Above the Desk

    The wall above the desk is prime storage space. Adding two or three shelves above your workstation keeps important items nearby without crowding the desktop.

    Keep daily-use essential house items on the lowest shelf. Store less-used items higher up. This setup works well for notebooks, pens, desk organizers, small plants, calendars, and storage boxes.

    Mix Open and Closed Storage

    Open shelves look stylish, but they can become messy if everything is visible. That is why the best setup combines open shelving with closed storage.

    Use open shelves for attractive items like books, plants, framed photos, and decorative objects. Use closed boxes, bins, and cabinets for paperwork, cables, printer paper, and supplies. This keeps the office practical while still looking clean.

    Choose Adjustable Shelving

    Choose Adjustable Shelving

    Adjustable shelves are smart because your storage needs may change over time. You may need space for a printer now, but later you may want more room for books or file boxes.

    Wall-mounted adjustable systems are great for growing workspaces. They let you move shelves up or down without replacing the whole unit. This is especially useful for remote workers, students, and small business owners.

    Use Vertical Shelving to Save Floor Space

    When the office is small, go vertical. Tall shelving units help store more items without taking up much floor area. They are ideal for apartments, condos, and compact homes.

    A narrow vertical shelf can fit beside a desk, behind a door, or next to a window. Use the lower shelves for heavier office supplies and the upper shelves for decor or seasonal items.

    Add Baskets, Boxes, and Labels

    Shelves work better when they are organized. Baskets, boxes, and labels prevent open shelves from looking messy.

    Use labeled bins for documents, cables, notebooks, tech accessories, and stationery. Clear boxes work well when you need to see what is inside. Woven baskets add warmth and style while hiding clutter, especially if you like handmade details such as weave a willow basket storage.

    Create a Printer and Supply Station

    Printers, paper, ink, envelopes, and mailing supplies can quickly take over a desk. A dedicated shelf or cabinet can keep all of these items in one place.

    Place the printer on a sturdy lower shelf. Store paper, ink, and mailing supplies nearby. This makes the office easier to use and keeps your main work surface clear.

    Style Shelves Without Losing Function

    Style Shelves Without Losing Function

    Shelving should not look like a storage dump. A good rule is to mix practical items with decorative ones. Place books upright and stacked, add a small plant, include one framed piece, and use baskets for the less attractive items.

    Leave some empty space too. Crowded shelves make a room feel smaller. A little breathing room makes the office look more intentional and relaxing.

    Best Shelving Ideas for Renters

    Renters can still create great storage without major changes. Freestanding bookcases, ladder shelves, cube units, rolling carts, and tension shelving systems are good options.

    When your office shares space with a living room, shelving should support storage without blocking movement, seating, or screen visibility. how to arrange living room furniture with TV can help you plan a balanced layout that keeps the workspace useful and the room comfortable.

    Removable wall hooks and lightweight floating shelves may also work depending on lease rules. Always check weight limits before placing books or office equipment on temporary shelves.

    Frequently Asked Questions

    1. What are the best shelves for a small home office?

    Floating shelves, tall bookcases, cube shelves, and corner shelves are great for small offices because they use vertical space and keep the floor more open.

    2. How do I make office shelves look less cluttered?

    Use matching baskets, labeled boxes, closed containers, and a mix of books and decor. Keep only the most useful or attractive items visible.

    3. Can renters use shelves in a home office?

    Yes. Renters can use freestanding shelves, cube organizers, ladder shelves, rolling carts, and lightweight removable options where allowed.

    4. What is the easiest way to use Home Office Shelving Ideas to Maximize Storage?

    Start with the wall above your desk, add floating shelves, use bins for small items, and keep daily essentials on the lowest shelf.

    Final Thoughts

    When I look at a well-organized workspace, I notice how much shelving changes the entire mood of the room. A few smart shelves can clear the desk, make supplies easier to find, and give the office a more finished look. 

    The best Home Office Shelving Ideas to Maximize Storage are not just about adding more places to put things. They are about creating a workspace that feels calm, useful, and ready for real work.

  • Design Riddle: Where to Place Mirror in Bedroom for Style

    Design Riddle: Where to Place Mirror in Bedroom for Style

    Finding the perfect arrangement for your primary suite can feel like a giant puzzle, especially when you are trying to balance cozy comfort with smart home styling. You pick out matching nightstands, find a gorgeous wooden chest, and slide your mattress against the main accent wall. 

    But then comes the ultimate layout question: where to place mirror in bedroom zones without ruining the whole vibe? It is a question every home decor lover asks because a bad placement can make a space feel chaotic, while a smart setup changes the entire atmosphere. 

    Why Obsessing Over Glass Position Is Your New Secret Weapon

    Figuring out exactly where to place mirror in bedroom zones is the ultimate home decor cheat code. A misplaced piece of glass turns your peaceful sanctuary into a chaotic hall of reflections, but strategic placement acts like magic.

    It multiplies your natural morning sunshine, makes affordable nightstands look like designer pieces, and expands your square footage without a costly remodel. Getting this choice right means unlocking your home’s hidden potential while protecting your nightly peace.

    The Absolute Best Locations for Your Reflective Surfaces

    Choosing the right coordinates for your wall decor helps your wooden armoires and upholstered bed frames truly stand out.

    The Side Wall Solution

    The Side Wall Solution

    Placing full-length panels or heavy leaning mirrors on the wall adjacent to your mattress setup is an excellent way to balance structural symmetry and personal comfort. 

    This clever positioning allows you to access a complete view of your outfits during your easy morning ritual without forcing you to stare at your own reflection while relaxing. It keeps the glass completely out of your direct line of sight when you are under the blankets, maintaining a serene environment.

    The Hidden Wardrobe Door Tactic

    Mounting a sleek full-length glass panel directly to the interior of a walk-in wardrobe door is ideal if you want total invisibility during your rest hours. This hidden setup gives you all the dressing utility you need while keeping the reflective surface completely inactive and out of sight when the doors are closed. 

    It is a brilliant space-saving hack for minimalists who want a clean look without sacrificing daily function.

    The Sunny Window Alignment

    Positioning your glass panels directly adjacent to an exterior window catches incoming daylight at the perfect angle and bounces it across deep room corners.

    This natural illumination trick makes your entire floor plan feel significantly larger and brighter while highlighting the natural wood grains of your surrounding chests. It turns dark corners into inviting spaces that look beautiful from sunrise to sunset.

    The Elevated Dresser Anchor

    Hanging a wide decorative frame above a bedroom dresser is a timeless functional pairing that

    The Elevated Dresser Anchor

     transforms your storage furniture into a deliberate vanity station. You simply need to ensure that this furniture ensemble sits along a side wall so the glass catches views of beautiful artwork or clean accent wallpaper. 

    A dresser mirror looks more polished when the furniture beneath it is well cared for, so learning how to oil wooden bedroom furniture can help the whole setup feel warmer and more refined.

    This approach creates a gorgeous visual anchor that grounds the room without creating an uncomfortable reflection of your sleeping space.

    Critical Layout Zones You Want to Avoid Completely

    Avoiding certain structural positions ensures that your sleeping environment remains a peaceful sanctuary free from visual clutter.

    A peaceful bedroom depends on both smart mirror placement and quiet furniture, so learning how to fix squeaky wooden bed can help create a calmer sleep setup.

    The Restless Mirror Facing Mattress Blunder

    Design professionals and traditional wellness experts strongly advise against hanging any reflective surfaces where they directly face your pillows. Catching sudden movements or shapes in the glass during the middle of the night can be deeply unsettling and easily disrupt your deep sleep cycles.

    It creates a state of low-grade decreased alertness that prevents your mind from fully recharging after a long day.

    The Main Entry Door Rebound

    Placing a large piece of glass directly opposite the main entrance to your room is another layout mistake that can make the space feel unwelcoming. 

    This orientation instantly bounces incoming natural light and visual energy right back out into the hallway before it can circulate. It creates a jarring first impression whenever you walk across the threshold instead of welcoming you into a cozy room.

    The Double Reflection Trap

    Positioning two large mirrors directly across from each other creates an endless reflection loop that can make human eyes feel dizzy and disoriented. This overlapping layout choice results in fragmented visual lines and a strange funhouse effect that ruins the relaxing atmosphere of a master suite. 

    It is much better to spread your reflective pieces across different rooms to give each item breathing room.

    The Chore Multiplication Effect

    You want to be incredibly mindful of what objects are being doubled in your daily view when organizing your wall decor pieces. 

    Angling your frames toward unmade laundry piles, messy utility spaces, or a tangled web of electronic charging cords simply duplicates the feeling of household clutter. Keeping the glass focused on clean walls or empty corners preserves a tidy and serene aesthetic.

    Place Mirror in Bedroom Floor Plans Safely 

    Place Mirror in Bedroom Floor Plans Safely 

    Mastering the actual installation of your new decor elements requires a blend of safety and smart design rules.

    When you are ready to hang your chosen frame, the most effective approach is to ensure the absolute center of the display hangs roughly sixty inches above your flooring material.

    If your room layout absolutely forces a heavy piece to look toward your mattress due to limited wall options, you can easily solve the issue with a beautiful decorative textile cover or a sliding curtain track system. 

    This lets you enjoy the spatial benefits during the daytime while blocking the glass completely when it is time to turn off the lamps. Always secure your heavy accent hardware directly into solid wall studs using proper anchor pieces to protect your expensive furniture.

    Frequently Asked Questions 

    1. Where to avoid mirrors in bedroom floor plans?

    You should completely avoid placing mirrors directly across from your mattress or right in front of your main doorway. These positions create distracting reflections that can startle you at night and disrupt the peaceful energy of your room.

    2. Where should mirrors be placed for good luck and positive energy?

    Mirrors should ideally be placed on a side wall perpendicular to your bed or positioned to reflect a beautiful window view. This arrangement invites bright natural light and fresh energy into your home without disturbing your sleep.

    3. Which direction is not good for mirrors inside a sleeping space?

    The southwest corner of a sleeping area is generally considered an unfavorable position for large reflective surfaces. This specific placement can cause visual imbalance and make the entire room environment feel restless instead of grounded.

    4. Why does Feng Shui say no mirrors in bedroom zones?

    Traditional principles suggest that reflective surfaces bounce energy around the room continuously, which keeps your subconscious mind active and alert. Facing the glass directly while resting can amplify daily stress and cause frequent tossing and turning.

    Sweet Dreams and Brighter Beams

    Perfecting your furniture layout comes down to knowing where to place mirror in bedroom walls to create a balanced, beautiful home sanctuary. By keeping reflections away from your pillows and leaning into natural light paths, you can maximize your floor plan effortlessly.

    Choose your ideal location today, match your frames to your favorite nightstands, and enjoy a brighter space.

  • How to Layer Bedding Queen Bed: The Ultimate Cozy Guide

    How to Layer Bedding Queen Bed: The Ultimate Cozy Guide

    Walking into a boutique hotel room always brings that immediate wave of calm, mostly because the bed looks like a giant, fluffy cloud you just want to dive right into.

    Replicating that exact designer look at home on your own mattress is much easier than it looks, even if you are working with a standard space. Let us pull back the curtain and look at how to layer bedding queen bed style so your bedroom feels like a high-end sanctuary every single night.

    Key Takeaways

    • Start with a high-quality mattress protector and fitted sheet to create a smooth, clean base layer.
    • Use exactly two Euro shams to perfectly fit the proportions and width of a queen mattress.
    • Triple fold your duvet at the bottom third of the bed to get that fluffy look.
    • Mix different textures like linen, waffle knits, and cotton to build depth without adding visual clutter.
    • Choose breathable, temperature-regulating fabrics to keep your beautifully layered bed functional and comfortable all night.

    Why Your Bedroom Desperately Needs This Makeover

    Have you ever wondered why some bedrooms look like a million bucks while others just feel flat?

    The same design thinking used in living room furniture layout ideas also applies here every layer should improve comfort, balance, and visual flow.

    The secret lies entirely in your styling technique. Mastering how to layer bedding queen bed layouts bridges the gap between chaotic mess and visual masterpiece. 

    It turns your sleeping space into a gorgeous focal point that elevates your entire home. Plus, it gives you the ultimate cozy reward at the end of every tiresome workday.

    Setting Up Your Clean Canvas Foundation

    Every gorgeous bed starts with the foundation pieces that you cannot actually see from the bedroom door.

    Snug Fitted Sheet Smoothness

    Stretch your fitted sheet snugly over your queen mattress, smoothing out any stubborn wrinkles as you go. Ensuring a tight fit prevents the fabric from bunching up uncomfortably while you sleep. This simple step creates a perfectly uniform, crisp surface that makes the subsequent layers sit beautifully.

    Crisp Flat Sheet Alignment

    Crisp Flat Sheet Alignment

    Lay the flat sheet evenly over the bed with plenty of slack at the top end. For a tailored, hotel style finish, tuck the bottom edge and sides tightly under the mattress to create sharp hospital corners at the foot. This classic technique locks the sheets in place so your bed stays pristine.

    Executing The Perfect Fold

    Fold the top edge of your flat sheet down about six to ten inches toward the foot of the bed. This simple flip creates a clean, visible band that frames your accent blankets beautifully. It adds an immediate touch of luxury and gives the top of your bed a welcoming, open appearance.

    Adding the Cozy Middle Insulation Layers

    The middle elements add vital physical warmth and crucial texture to your bedroom furniture sanctuary.

    Placing the Core Bed Blanket

    Add a lightweight cotton or waffle weave blanket right over your top sheet for immediate texture. This layer introduces a subtle pattern change that catches the eye without overpowering the room. It also serves as an excellent solo layer during warmer seasonal transitions.

    Introducing the Textured Quilt

    Place a textured quilt or an elegant coverlet directly over your baseline blanket. Pull this piece up to just below your folded top sheet to keep the layers distinct. Tuck the excess fabric neatly under the foot and sides of the mattress to maintain a sleek profile.

    Creating the Ultimate Plump Top Cloud

    The very top of your mattress is where you build that irresistible, cloud like luxury.

    Laying the Main Duvet Flat

    Spread your primary duvet or heavy comforter completely flat across the surface of the bed. Make sure the sides hang evenly over your wood or upholstered bedroom furniture frame. This layer provides the main physical bulk and cozy presence of your entire design.

    The Inviting Turn Down Trick

    The Inviting Turn Down Trick

    Fold the top third of the duvet down towards the foot of the bed, then fold it back up on itself accordion style. This smart maneuver lets your gorgeous middle blankets and crisp sheets peek through beautifully. It creates a highly inviting, plump look that screams pure comfort.

    Arranging Your Pillow Stack Proportions

    Proportions are everything when you are working with a queen size layout rather than a massive king setup.

    Just as learning how to choose a sofa for living room helps create better comfort and proportion in a seating area, choosing the right pillow sizes helps your queen bed look balanced instead of overcrowded.

    Framing With Euro Shams

    Place two large square Euro shams measuring twenty six by twenty six inches upright against your headboard. These oversized pillows serve as a gorgeous backdrop that anchors the entire design. They hide your daily sleeping pillows while adding necessary height to the mattress.

    Stacking Standard Sleeping Pillows

    Place your standard or queen size sleeping pillows directly in front of the large Euro shams. You can stack them flat or prop them up at a slight angle depending on your style. Keeping them hidden behind the accent pieces maintains that clean, boutique hotel aesthetic.

    Layering the Accent Pillows

    Layer one or two smaller decorative throw pillows measuring around twenty by twenty inches right in front. This is your golden opportunity to introduce a playful splash of color or a unique velvet texture. These elements tie your bedding directly into the rest of your bedroom decor.

    Center Stage Lumbar Support

    Center Stage Lumbar Support

    Finish the entire pillow arrangement by placing one elongated, rectangular lumbar pillow right in the center. This singular piece unifies the entire stack and prevents the arrangement from looking cluttered. It provides a clean visual endpoint that draws the eye right to the middle.

    Dropping the Final Elegant Accent Touch

    The absolute final step is all about creating a relaxed, high-end editorial feel.

    The Casual Throw Blanket Drape

    Fold a chunky knit or a luxurious faux fur throw blanket neatly into thirds horizontally. Drape it cleanly across the foot of the bed, or casually toss it over one corner for a relaxed, cozy aesthetic. This final element adds depth and completes your masterpiece.

    Frequently Asked Questions

    1. How to layer bedding on a queen bed?

    To layer bedding on a queen bed perfectly, you must build upwards from the mattress using varying textures. Start with a fitted and flat sheet, add a breathable quilt, top it with a folded duvet, and arrange your pillows from largest to smallest.

    2. What is the best bedding for menopause patients?

    The best bedding options are natural, moisture wicking fabrics like one hundred percent bamboo, eucalyptus, or lightweight linen. These materials regulate body temperature, repel sweat, and keep your skin cool by preventing trapped heat during sudden nighttime hot flashes.

    3. What is the correct order of bedding?

    The correct order starts with a mattress protector and fitted sheet, followed by the flat sheet. Next comes your middle blanket or quilt, then your main fluffy duvet, and finally your decorative shams, pillows, and foot throws.

    4. Which goes first, quilt or comforter?

    The quilt always goes first under the comforter if you are pulling both layers all the way up for warmth. Alternatively, lay the quilt flat over the sheets and fold your fluffy comforter neatly at the foot of the bed.

    Time to Snuggle Into Your Masterpiece

    Learning how to layer bedding queen bed style completely transforms your bedroom decor from a basic sleeping space into a gorgeous designer retreat. By mixing cozy textures, balancing your pillow sizes, and using the accordion fold trick, you get a gorgeous bed that welcomes you home every evening. Grab your favorite blankets, play with your layout, and enjoy your beautifully styled new space.

  • Kids Furniture for Sensory Room: Calm and Safe Setup Ideas

    Kids Furniture for Sensory Room: Calm and Safe Setup Ideas

    Creating a sensory room at home is one of the most thoughtful ways I can support a child who needs help with calming, movement, focus, or emotional regulation. The right kids furniture for sensory room setups does more than fill space. 

    It helps create dedicated zones for vestibular movement, proprioceptive deep pressure, and tactile exploration so children can better regulate their nervous systems in a safe, comfortable environment.

    Why Sensory Room Furniture Matters for Children

    A sensory room works best when every furniture piece has a purpose. Some children need deep pressure when they feel overwhelmed. Others need safe movement through rocking, spinning, swinging, or balancing. Some children calm down through touch-based play with textures like sand, water, rice, foam, or soft fabrics.

    That is why sensory room furniture for kids should not be chosen only for style. It should support the child’s body, emotions, and daily needs. For many US families, a sensory room can fit inside a bedroom corner, playroom, basement, therapy space, or homeschool area without requiring a full renovation.

    Best Kids Furniture for Sensory Room by Sensory Need

    The strongest sensory room setup usually has three zones. A calming zone supports deep pressure. A movement zone supports vestibular input. A tactile zone supports hands-on discovery and fine motor development. When these areas work together, the room feels organized instead of overstimulating.

    Vestibular and Movement Furniture for Active Kids

    Vestibular furniture helps children understand balance, motion, and spatial awareness. These pieces are useful for kids who enjoy rocking, spinning, swinging, or shifting their weight while playing or relaxing.

    Compression Swings for Calming Movement

    Compression Swings for Calming Movement

    Compression swings are popular because they combine gentle movement with a cocoon-like feeling. The fabric wraps around the child and gives a hug-like effect while allowing controlled swinging. This can help some children feel grounded after school, before bedtime, or during emotional overload.

    A ceiling-mounted swing should always be installed according to safety guidelines. For renters or smaller homes, a swing stand may be a better option.

    Swivel and Spinning Chairs for Sensory Seekers

    Swivel chairs and spinning floor seats allow controlled 360-degree movement. These can help children who seek rotation and motion, but they should be used with supervision. I would choose a low-profile spinning chair with a stable base instead of tall furniture that may tip.

    Wobble Chairs and Spoon Chairs for Restless Bodies

    Wobble chairs, spoon chairs, and ergonomic rocking seats give restless kids a safe outlet for movement. They allow children to shift weight, rock gently, and stay engaged without running across the room. These are especially helpful in homework corners, reading areas, and homeschool sensory spaces.

    Proprioceptive and Deep Pressure Furniture for Calming

    Proprioceptive furniture supports deep pressure and body awareness. This type of furniture, including pieces made with soft padding or acrylic fibre, is helpful for children who crash, squeeze, jump, roll, or seek firm physical feedback when they feel dysregulated.

    Crash Pads for Safe Jumping and Decompression

    Crash pads are one of the most useful pieces of sensory furniture for autism, ADHD, and sensory-seeking behavior. Large foam mats allow children to jump, roll, fall, and decompress impact safely. A good crash pad should have durable fabric, strong stitching, enough thickness, and a washable cover.

    Body-Conforming Loungers for Quiet Breaks

    Body-Conforming Loungers for Quiet Breaks

    Body-conforming loungers, bean bags, and foam chairs mold around the child’s body. This helps reduce uncomfortable pressure points and creates a cozy place for reading, resting, or calming down. For daily use, I would choose removable covers and stain-resistant materials.

    Inflatable Peapods for Gentle Compression

    Inflatable peapods look like small canoe-shaped sensory seats. They gently squeeze the child from the sides, offering lateral compression that may help reduce anxiety and improve body awareness. These work well in calming corners but should match the child’s size and comfort level.

    Tactile Exploration Furniture for Learning and Focus

    Tactile furniture supports touch-based play. This helps children explore textures, improve fine motor skills, build focus, and stay engaged through hands-on learning.

    Montessori Sensory Tables for Texture Play

    Montessori sensory tables are excellent for sand, water, rice, beans, kinetic sand, or other safe textures. Dual-bin tables are especially useful because children can compare materials, scoop, pour, sort, and explore with both hands.

    A sensory table should be sturdy, easy to clean, and placed on washable flooring or a mat. For younger children, I would avoid tiny materials that may create choking risks.

    Soft Rugs, Mats, and Floor Cushions

    Soft rugs, foam mats, and floor cushions make the room more comfortable and safer. They also create clear zones for play, calming, and movement. In a US home, washable rugs or interlocking foam tiles are practical because spills and messes are common in kids’ spaces.

    How to Choose Safe Sensory Room Furniture for Kids

    Safety should come before appearance. I look for rounded corners, low-height furniture, sturdy bases, non-toxic finishes, washable fabrics, and age-appropriate weight limits. Choosing eco-friendly kids furniture with safe materials and non-toxic finishes can also make the room healthier and more suitable for daily use. Furniture should not block doors, vents, windows, or walking paths.

    Calming colors also matter. Soft blue, sage, cream, gray, muted green, and warm neutrals often work better than bright red, neon orange, or busy patterns. A sensory room should feel supportive, not visually loud.

    Small Sensory Room Setup Ideas for US Homes

    A sensory room does not need to be large. A bedroom corner can include a soft rug, bean bag, sensory tent, small shelf, and a crash pad. A playroom can include a swing, tactile table, and storage bench. A basement can become a full movement zone with mats, foam blocks, and deep pressure seating.

    The key is to avoid overcrowding. Too much furniture can make the room harder to use. I would start with one calming piece, one movement piece, and one storage solution before adding more.

    Storage Furniture for a Clutter-Free Sensory Room

    Storage is not just about neatness. Clutter can overstimulate children and reduce the calming effect of the room. Cube shelves, soft bins, low bookcases, storage benches, and closed cabinets help keep sensory tools organized.

    I prefer keeping only a few items visible at one time. Rotating toys, textures, and furniture accessories can make the room feel fresh without becoming chaotic.

    Common Mistakes Parents Should Avoid

    One common mistake is buying trendy sensory furniture before understanding the child’s needs. A child who avoids spinning may not enjoy a swivel chair. A child who craves pressure may use a crash pad or peapod more often than a tent.

    Another mistake is forgetting supervision. Swings, spinning chairs, climbing cushions, and crash pads are helpful, but they still require safe placement and adult guidance. The best kids furniture for sensory room designs should support independence without creating unnecessary risk.

    Frequently Asked Questions (FAQs)

    1. What furniture should I put in a kids sensory room?

    A good sensory room can include a compression swing, crash pad, bean bag, sensory tent, wobble chair, soft rug, Montessori sensory table, storage shelves, and body-conforming lounger.

    2. What is the best sensory furniture for autism?

    The best sensory furniture for autism depends on the child. Many children benefit from crash pads, compression swings, inflatable peapods, soft loungers, quiet tents, and low-clutter storage furniture.

    3. Can I create a sensory room in a small bedroom?

    Yes. A small bedroom corner can work well with a soft rug, floor cushion, bean bag, calming tent, small storage unit, and one movement-based item like a wobble chair or compact swing.

    4. How do I make sensory furniture safer?

    Choose sturdy furniture with rounded edges, washable materials, proper weight limits, non-toxic finishes, and stable bases. Keep walkways open and supervise swings, spinning chairs, and crash pads.

    Final Thoughts

    When I choose kids’ furniture for sensory room spaces, I focus on balance. A great setup should include calming deep pressure, safe vestibular movement, tactile discovery, and simple organization. With the right furniture, a sensory room can become a peaceful, practical, and supportive space where children feel safer, calmer, and more in control at home.

  • How to Choose the Right Office Chair for Long Hours

    How to Choose the Right Office Chair for Long Hours

    I have learned that a chair can quietly decide how a workday feels. A good one helps me stay focused, relaxed, and supported. A bad one makes every hour feel longer. That is why How to Choose the Right Office Chair for Long Hours matters before buying any desk chair for home office, business work, studying, or daily computer use.

    Why Your Office Chair Matters During Long Workdays

    Long sitting puts pressure on the lower back, hips, thighs, shoulders, and neck. The right office chair does not just look professional. It helps your body stay supported while allowing small movements throughout the day.

    A chair for long hours should support posture without forcing you into a stiff position. It should adjust to your body, desk height, and working style. When the chair is wrong, you may start leaning forward, lifting your shoulders, crossing your legs, or sitting on the front edge of the seat. These small habits can create discomfort over time.

    Before choosing a chair, it also helps to review home office layout ideas for maximum productivity so your desk, chair, screen, and storage all work together comfortably.

    Check Lumbar Support First

    Lumbar support is one of the most important features in an office chair. It supports the natural curve of the lower back and helps reduce slouching. For long workdays, choose a chair with adjustable lumbar support instead of a fixed bump that may not fit your back.

    The best option lets you move the lumbar support up, down, forward, or backward. When you sit back, the support should touch your lower back comfortably without pushing too hard. If the chair leaves a gap behind your lower back, it may not give enough support for long hours.

    Choose the Right Seat Height

    Seat height decides how well your whole body lines up with your desk. Your feet sh

    Choose the Right Seat Height

    ould rest flat on the floor. Your knees should stay close to a 90-degree angle or slightly open. Your thighs should feel supported without pressure.

    A pneumatic height adjustment is best because you can change the height while seated. If your feet do not touch the floor after adjusting the chair to desk level, use a footrest. This helps reduce pressure behind the knees and keeps your posture more stable.

    Look at Seat Depth and Cushion Comfort

    Seat depth is often ignored, but it matters a lot for long sitting. When you sit all the way back, there should be a small gap of about two to three inches between the front edge of the seat and the back of your knees.

    If the seat is too deep, it may press behind your knees. If it is too short, your thighs may not get enough support. A good cushion should feel firm but not hard. Very soft seats may feel nice at first, but they can sink too much after a few hours.

    Pick Adjustable Armrests

    Armrests help reduce shoulder and neck strain when they are set correctly. Your elbows should rest close to your body, and your shoulders should stay relaxed. Adjustable armrests are better than fixed ones because desk heights and body sizes vary.

    Look for armrests that move up and down at minimum. For better comfort, choose 3D or 4D armrests that also move forward, backward, inward, and outward. Avoid armrests that force your shoulders upward or stop you from pulling close to the desk.

    Choose Breathable Materials

    Choose Breathable Materials

    Material affects comfort, especially during long work sessions. Mesh chairs are popular because they allow airflow and help reduce heat buildup. Fabric chairs can feel softer and warmer, much like fabric and leather sofas. Leather or faux leather chairs look premium but may feel hot after many hours.

    For daily long-hour use, breathable mesh or high-quality fabric is usually more practical. Also check the seat cushion quality, stitching, and frame strength. A stylish chair is not useful if it becomes uncomfortable after one month.

    Recline, Tilt, and Movement Support

    A chair should not lock your body in one position all day. Recline and tilt features let you change posture, reduce pressure, and move naturally. A good office chair should allow controlled reclining, tilt tension adjustment, and stable back support.

    The backrest should move with you but not feel loose. Tilt lock can help when you want a more upright position for focused work. For long hours, movement matters because your body needs small posture changes throughout the day.

    High-Back vs Mid-Back Office Chairs

    A high-back office chair supports the upper back, shoulders, and sometimes the head. It is useful for people who sit for long hours, take calls, recline often, or want full-back support.

    A mid-back chair can work well for shorter tasks or compact spaces. It supports the lower and middle back but usually does not support the shoulders or head. For extended workdays, a high-back ergonomic chair is often the better choice.

    Do the Long-Hours Chair Fit Test

    Do the Long-Hours Chair Fit Test

    Before buying, use this simple fit test. Sit fully back in the chair. Your feet should be flat. Your knees should feel relaxed. Your lower back should touch the lumbar support. Your shoulders should stay down. Your elbows should rest comfortably. Your screen should be at eye level.

    If you feel pressure behind your knees, tension in your shoulders, or a gap near your lower back, the chair may not be right. This test is one of the easiest ways to understand How to Choose the Right Office Chair for Long Hours without getting distracted by looks alone.

    Mistakes to Avoid When Buying an Office Chair

    Do not buy only based on design. A beautiful chair with poor support can become painful quickly. Do not choose a chair without checking weight capacity, seat width, adjustability, and return policy.

    You can also compare chair style with home office decorating ideas on a budget so the setup feels comfortable, useful, and affordable.

    Avoid chairs with fixed arms, weak lumbar support, thin cushions, or no recline control if you work long hours. Also avoid assuming that expensive always means better. The best chair is the one that fits your body, desk, and daily routine.

    Frequently Asked Questions

    1. What is the best office chair for sitting long hours?

    The best office chair for long hours has adjustable lumbar support, seat height control, seat depth adjustment, breathable material, armrest adjustment, and smooth recline support.

    2. How do I know if my office chair is ergonomic?

    An ergonomic chair should adjust to your body. Your feet should stay flat, your lower back should be supported, and your shoulders should feel relaxed while typing.

    3. Is mesh or leather better for long sitting?

    Mesh is usually better for airflow and long workdays. Leather looks more formal but can feel warmer during extended sitting.

    4. How to Choose the Right Office Chair for Long Hours if I work from home?

    Choose a chair that fits your desk height, supports your lower back, allows movement, and stays comfortable after at least one to two hours of sitting.

    Final Thoughts

    I would never choose an office chair by looks alone. For long workdays, comfort, support, and adjustability matter more than style. The right chair should fit your body, help your posture, and make work feel easier from morning to evening. Once you know what to check, buying the right chair becomes much simpler.